
How to Remove a Watch Bracelet
Please see below the full video tutorial for this process. Please like if you find it useful and don’t forget to subscribe. I have outlined a step by step guide below also with some extra helpful hints.
Reasons to Remove a Bracelet
Watches are supplied on either a metal bracelet, a leather strap or a rubber strap. Sometimes it’s nice to swap between straps and bracelets to suit different use situations or just to give the watch a different look. Older Rolex watches have the serial number hidden behind the bracelet, so it’s necessary to remove the bracelet to read. Removing the bracelet can be a challenge and is a significant cause of scratching to the rear of the case if you don’t take care.
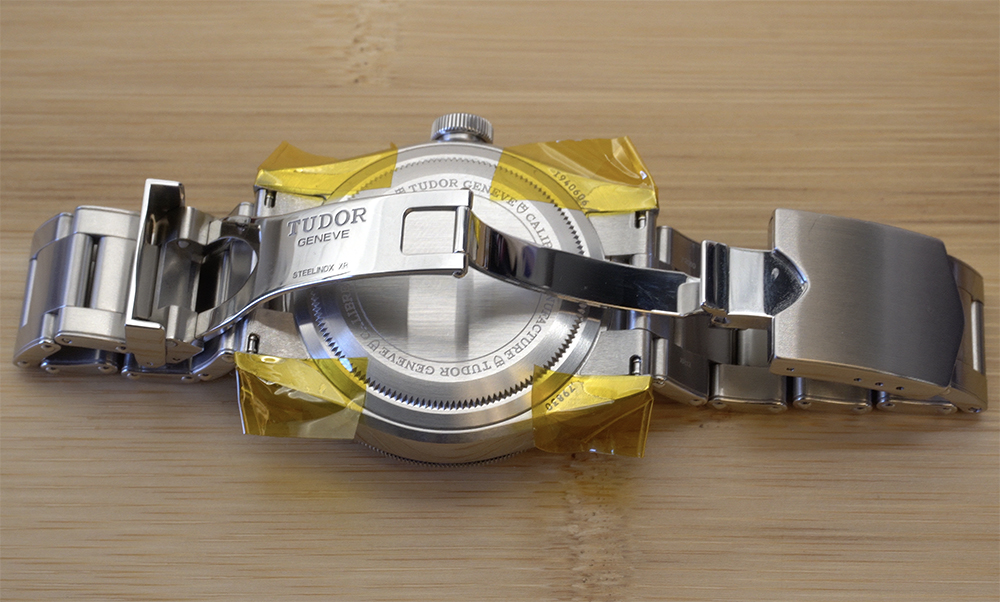
This process covers any watch brand where the bracelet is secured using compressible spring bars. This process is suitable for brands such as Rolex, Tudor and Omega. The video and stills are from the Tudor Back Bay.
The bracelet is connected to the Watch Head by the End Link. The End Link is usually shaped to conform to the Watch Head and has a hole running though to house the Spring Bar. The Spring Bar is sized correctly to the Lug Width and the internal diameter of the hole passing through the End Link.
Ensure you measure the lug to lug width of your bracelet to ensure you fit the correct width replacement strap. It is common now to use odd sized lug widths such as 19 and 21mm which can reduce choice.
Tools to Safely Remove Links
Before starting, ensure you have the correct tools to do the job. A set of spring bar compressing pliers or tweezers is a must.
To keep your watch safe and prevent scratches, I highly recommend you tape over the screw using polyimide tape. Refer to the Hints & Tips page for details.
Step 1 - Protection
You will often see tutorials online where the owner digs into the lugs with a spring bar tool. Don’t do this.
Tape the lugs as mentioned before. I have made the mistake of thinking “I don’t need to do it this time” or “I’m in a rush”. STOP…!! Tape your lugs.
Step 2 - Proceed Carefully
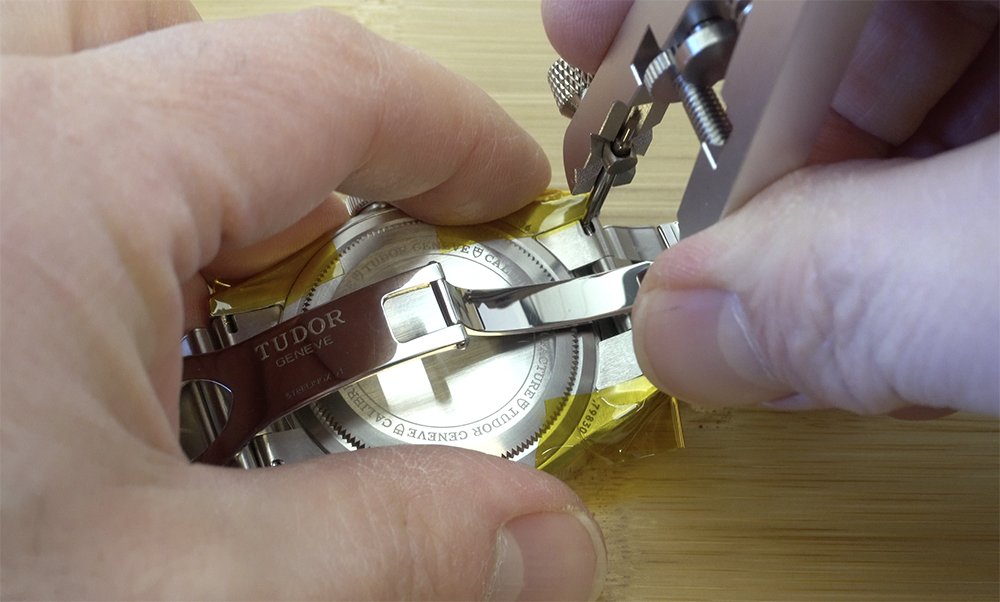
If using the plier style tool, ensure it is wide enough to cover the lug width.
Carefully place the tool into the slot, one side at a time. Be calm when doing this as damage can still be done.
Pinch the tool together trying to catch the raised part of the spring bar. Apply some downward force at the same time.
Once the bars have compressed, move the watch head away from the bracelet with the tool remaining still.
I have found that moving the bracelet can allow the tool to slip.
Finally, be careful not to allow the spring bar to ping across the room.
Step 3 - Re-Assembly
This is just the reverse of the removal. Protect the lugs and be sure to but the bracelet the correct way round. I usually check the text on the clasp matches that on the dial and start at the 12 o’clock, but there’s no rule as to which side to start with.
The video below shows the re-assembly of the Tudor bracelet, but this is the same process on any watch.
Please check out my other Hints and Tips articles and videos and leave any comments. Let’s talk about your experiences and share tips.